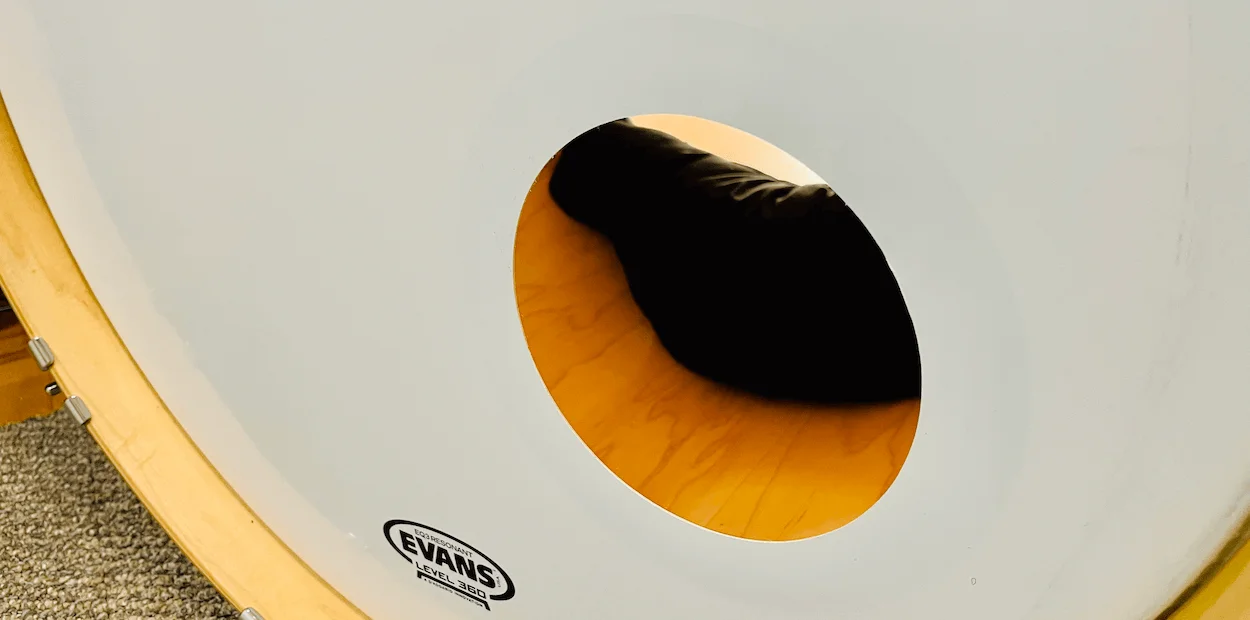
There are several advantages to having a port hole in your bass drum. It’s easier to use microphones, easier to adjust internal dampening, and it can tighten up your bass drum sound. Some bass drum heads come with the option pre-installed, but not all. In those cases, you’ll need to know how to cut a bass drum port hole yourself.
We made this guide to help you through the process. We’ll go through each step, show some pictures, and include some tips so you can get the best possible results. When you’re done, your bass drum will have a professional port hole that can last for many years.
*This post includes affiliate product links. We may receive a small commission from purchases made through those links, but your price does not increase at all. We take pride in only recommending the products that will help drummers most. Thank you for the support!
What you need
You’ll need 3 things to follow along with this guide – a bass drum head without a port hole, a utility knife, and a port hole template. If you don’t have a template yet, you can find them from most music retailers. There are different styles available, but we’re going to use a very popular and simple version – the Aquarian 5” Port-Hole. It’s a plastic ring template with adhesive on one side. It stays attached to the head after the hole is cut. Since we have a black bass drum head, we’re using a matching black template.

If you have a white drumhead, you may be able to see the template’s shape through the head, even if the template is attached to the backside of the head. The look doesn’t bother us at all, but it’s something to be aware of.
Can’t you just cut a hole?
You may wonder if you can just cut a hole without some type of template at all, maybe just use a 4″-6″ round item to guide the cut. The answer is yes, but there are a couple of downsides to that method. First, it’s easier to make a mistake because the object you’re using can shift while you’re cutting.
Second, it leaves the hole without reinforcement. A microphone or piece of hardware can contact the hole’s edge, causing it to tear. Having an attached port hole template protector will keep your bass drum head safe.
Plus, the low cost of the Aquarian port hole makes it a no-brainer for most people. You’ll have an easier time of making the cut and get the added protection over the life of the head.
With the port hole in hand, you’re ready to go! Here’s how to cut a bass drum port hole.
1. Determine Hole Location
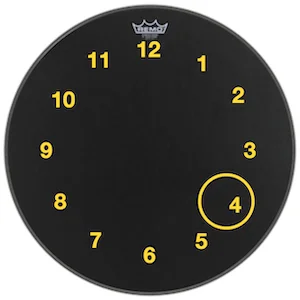
The first step in the process is deciding where you want the port hole. There are no rules, but most drummers put it somewhere around the 4:00 position, a few inches from the edge. This location will allow the drum to be mic’d easily with a mic stand positioned off to the side of the drum. That’s where we’ll install our port hole.
The template can also be attached to either the front or back side of the head. We’re going to attach ours on the backside for a cleaner look. We’re using a black drumhead, so we won’t see the template. If we were using a semi-transparent white head, you’d likely see the outline of the template, even if it’s attached to the backside of the head.
That being said, even with a semi-transparent head, we’d still attach the template to the inside in most cases.
2. Mark Center Point
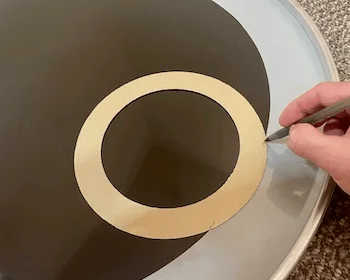
We’re eventually going to attach the template to the underside, but it’s easier to determine the hole’s center by working with the front. Don’t peel off the backing paper yet. Simply rest the template on the head where you want it.

When you’re happy with the position of the template, use a pen to mark the center. Push the pen into the head to create a dimple. You may need to use some force.
Now, flip the head over. Don’t peel off the backing paper yet. Place the template on the underside, using the dimple as a centering point. We’re just rechecking where the template will be attached.
3. Make Adjustments (if necessary)
The next step depends on your specific style of drumhead and personal preferences. If your bass drum head doesn’t have a dampener or your template isn’t overlapping the dampener, you should be able to move on to the next step.
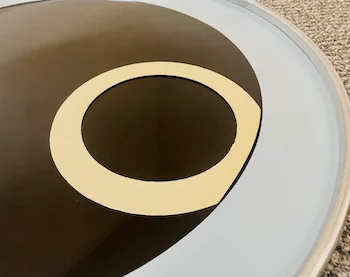
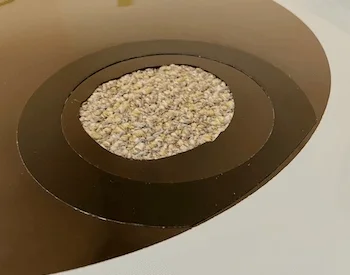
However, if your template lines up over an internal dampener (like the picture above), you’ll probably want to make some adjustments. Attaching a template on top or underneath a dampening ring can impact the efficiency of both the dampener and template. Here are your other options:
- Shift the template towards the center
- Cut an edge off the template
- Cut the dampening ring
- Put the template on the front side
All of those options have pros and cons. The color of your head can even influence your decision. If you can see through the head, you may not want to cut the template or dampening ring down.
We’re using a black head, so nobody will see any cuts we make. That’s why we’ll cut an edge off of our template. If we had a semi-transparent white head, we’d probably shift the hole slightly towards the center, rather than making any cuts.
If you decide to cut the template to avoid a slight overlap, you can simply use scissors to flatten out an edge. You don’t want to cut too much off, however. If your overlap is large, a combination of shifting the hole and cutting the template may be needed.
It’s easier if we first mark the backing paper, so we’ll lay the template upside down. Then, we’ll use a pen to mark where our scissor cuts will be.
Then, cut the template down and recheck your layout.
4. Attach Port Hole Ring
When you’re comfortable with the hole location and you’ve made any necessary adjustments, you can attach the template. Peel off the backing paper off and place the template onto the head. Be sure to slide your fingers around to make sure no air pockets are trapped in the adhesive.
If you made a mistake, you can usually peel the template off to reset its position.
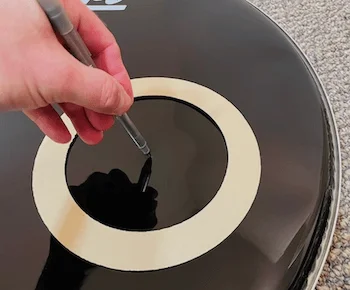
5. Make First Cut
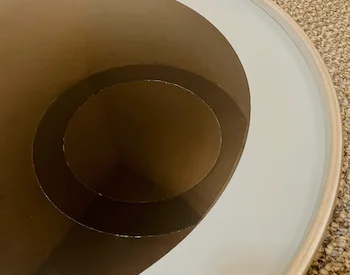
With the template properly attached, we’ll make our first cut. The goal here is to remove the inner portion of the hole. That will make it easier to cut along the edge. Slice into the center with your utility knife to make a 2″-3″ cut in the center of your template.
Then, turn your blade and cut the inner part of the hole out. This step doesn’t have to look pretty, but stay away from the attached template for now. Use this step to get a feel for the amount of pressure you’ll need to cut though the film. Try to be slow and steady.
6. Cut Around Edge
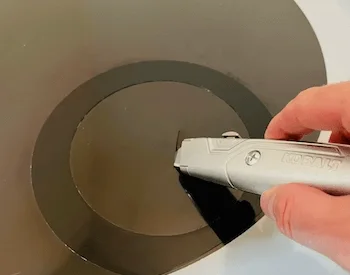
After the inner portion of the hole is removed, carefully slice at a steep angle towards the template. Stop when you mark contact.
Up next is the most difficult part of the process, although are ways to make the cut more precise. First and foremost, go slowly and be careful. We find it helpful to hold the head vertically in your lap while sitting down, perpendicular to your body. For extra protection, you can use a folded bath towel between the drumhead and your torso.
If you’re right-handed, hold the drumhead against your body and lap with your left hand. The inside of the drumhead should face your cutting hand, with the segment of the hole you’re currently working with closest to the floor.
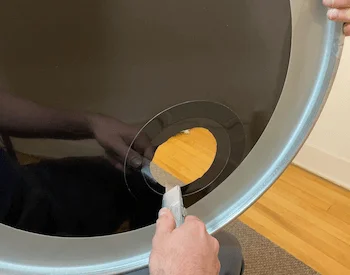
Make short 2″-3″ cuts around the edge, towards you. As you cut, make sure the side of your blade is sliding along the template as you go. If you feel the blade cutting into the template itself, stop and reposition your knife.
Next, rotate the drumhead slightly. Repeat your 2”-3” cuts as you rotate the head. This way, you’ll keep your cutting hand in a natural position. Finish the cut around the entire hole, trying your best to use slight pressure to slide your blade along the hole template.
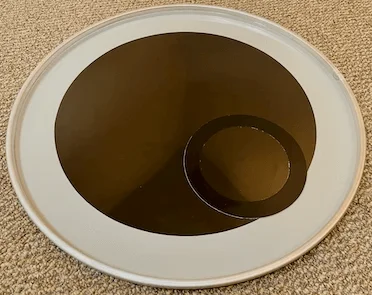
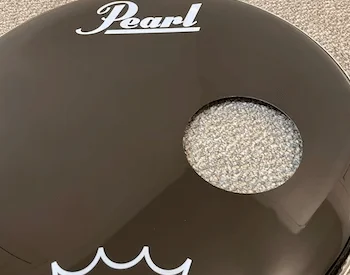
7. Check Your Work
Hopefully, you now have a near-perfect circle. If not, slight repair cuts can be made. Flat spots can be rounded out at this point.
One warning – it’s easy to overdo repairs. You may notice a slight defect, try to repair it, then cut off too much. Then, if try to compensate by cutting the rest of the hole, you can end up with a jagged mess. Repairs are usually necessary to clean up the initial cut, but be careful. Keep in mind that very slight deficiencies won’t be seen from a distance.
What if you really screwed up?
If your port hole looks especially bad, don’t be too hard on yourself. Even experienced drum techs make mistakes when cutting port holes. If you want to salvage the head, you have a few options.
If the template still looks fine, you may be able to peel it off the back and put it onto the front. You could also buy a second template and cover up mistakes on the front side. A 2-piece template could also be a good solution. Pull off the template and replace it with something like this Gibraltar 5-inch Port Hole. The front piece of that product can cover up minor blemishes.
Wrap-Up
That’s it! Hopefully you ended up with a clean new port hole. You’ll now have all of the advantages that come with having a ported bass drum head. If it’s your first attempt at cutting a port, the next time should be easier and more effective!
By Peter Treuden – About the Author
Need a new versatile bass drum batter head? Check out our Best Bass Drum Heads For All-Purpose Drumming!