Of all the heads on a drum set, the bottom snare drum head is the most challenging to change. Even if you’ve changed or tuned standard drumheads before, snare-side heads require a few unique steps that may be unfamiliar. Well, this step-by-step guide is here to make the process easy, no matter what your experience level is.
We’ll go through each step, show some pictures, and give you some pointers to get your snare drum sounding as good as possible. Hopefully, this guide is something even non-drummers can follow along with, while more experienced drummers can learn a useful tip or two.
*This post includes affiliate product links. We may receive a small commission from purchases made through those links, but your price does not increase at all. We take pride in only recommending the products that will help drummers most. Thank you for the support!
What type of head?
First off, if you don’t have a replacement head yet, there are a few things to be aware of. Snare-side heads are very thin, specifically designed for their purpose. If you put a standard drumhead on the bottom of your snare drum, it won’t sound much like a snare drum at all. You’ll want to be sure you have the right head for the job.
Size: Of course, you’ll need to know what size to get. If you don’t know the diameter of your drum, just measure the shell. You’ll need to measure from the inside of the drum hoop on one side to the inside of the hoop on the other side. Most snare drums are 14”, but not all.
Model: There are various thicknesses of snare-side heads available from several major brands. Almost every drummer should use a 3-mil thick snare-side head. The two most popular options are the Remo Hazy Ambassador and the Evans Snare-Side 300.
Either of those will work for almost any drummer, on almost any drum. Just make sure you’re getting the correct diameter.
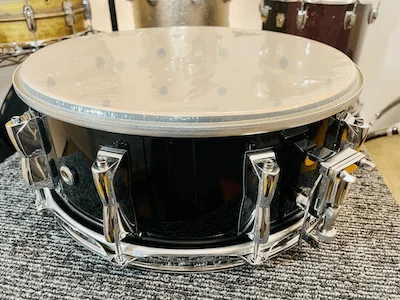
With the snare-side head in hand, you’re ready to go! Here’s how to change a bottom snare head.
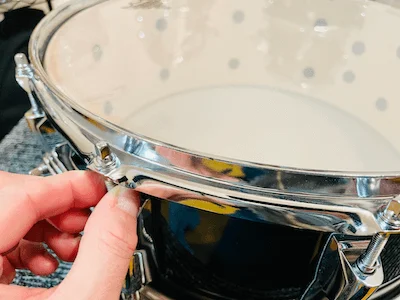
1. Remove the Wires
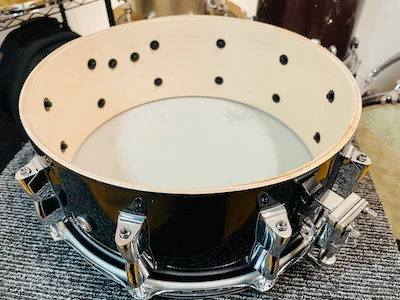
Removing your snare wires typically requires either a screwdriver or a drum key. If you’re using a screwdriver, be careful not to strip a screw head. Some snare drums use small screws or inferior metals, so try not to use a screwdriver that’s too big.
With the snare wires facing up, give the bolts or screws that keep the wires attached (usually 2 on each side) a few 1/2 turns. That will usually be enough to loosen the screws enough to slide the snare straps or cord out. If your drum uses cord, you may need to untie some knots.
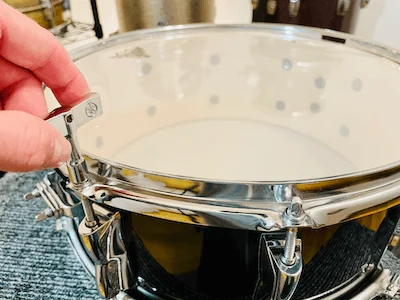
After loosening the screws and removing the wires, the bottom of the drum should look like this:
2. Remove Rods, Hoop, & Head
Use your drum key to loosen and remove all of the bottom tension rods. Be careful not to lose any washers while you pull the rods away from of the hoop. Set aside the tension rods for later.
Then, the hoop should come right off, leaving you with this:
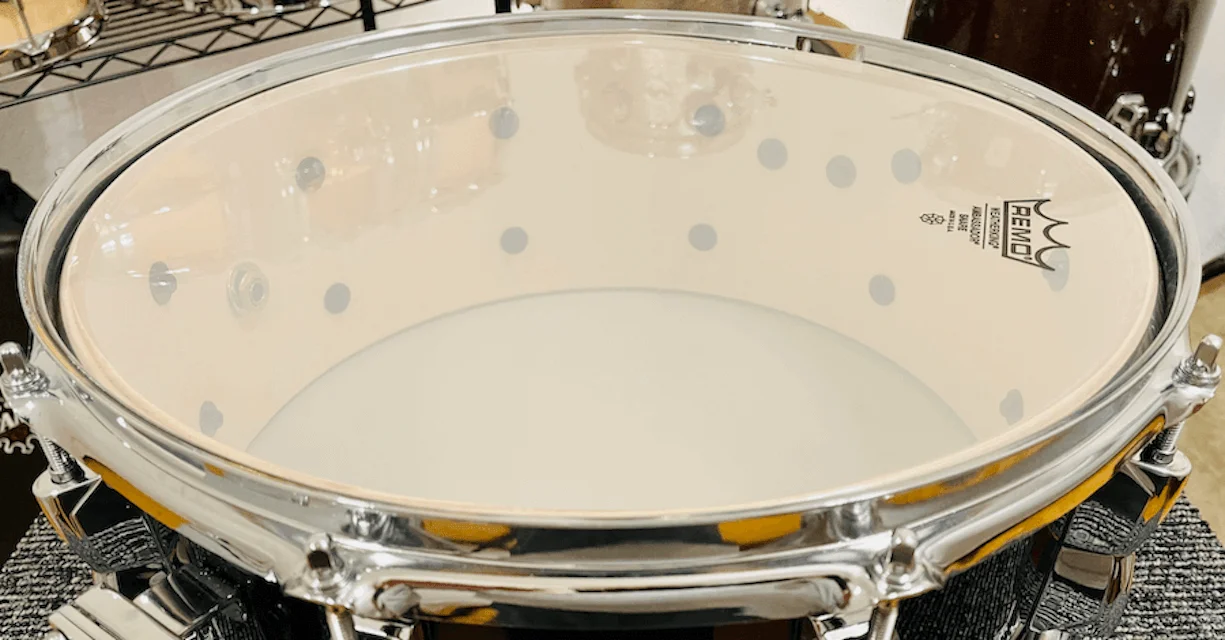
Finally, take off the old bottom head. Assuming your old head is worn out or damaged, it can be thrown away.
3. Clean Edge & Hoop
Dust and debris can collect in a drum’s crevices, especially under a bottom hoop. You’ll want to wipe the parts down so the new head can go on a clean surface. If you have a microfiber cloth, that’s best. Otherwise, a soft rag or towel is fine for most drums.
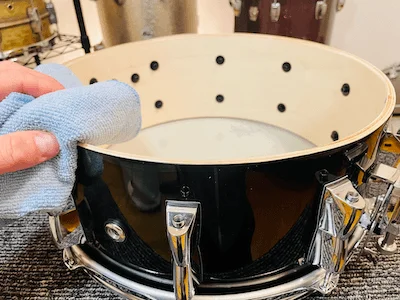
Make sure the metal hoop and drum shell’s edges are clean, and the inside of the drum doesn’t have any dust or dirt floating around.
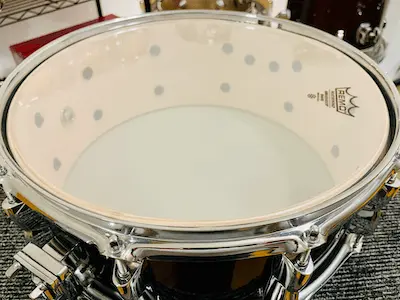
4. Place New Head & Hoop
Next, put the new head onto the shell. It should fit somewhat loosely, although some older drums might have a tighter fit. We like to rotate the head’s logo towards the badge of a drum for a clean look, but that’s up to you.
The bottom snare hoop should fit on top of the head. Snare drum bottom hoops usually have 2 slots, which you’ll want facing towards the tension strainer and butt plate. Here’s our hoop with the slot aligned to the drum’s butt plate:

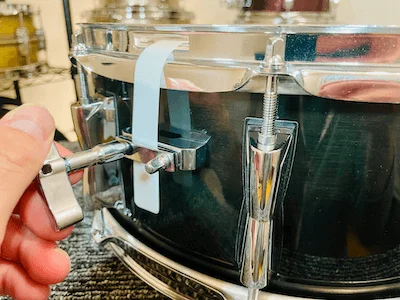
5. Finger-Tighten Tension Rods
Slide the tension rods through the hoop’s holes, threading them into the lugs beneath. Be careful not to cross-thread. That’s one reason to finger-tighten first, rather than using a drum key.
Tighten until the rod heads make contact with the drum hoop, but not beyond. This will ensure your hoop and head are close to level before tightening with a drum key.
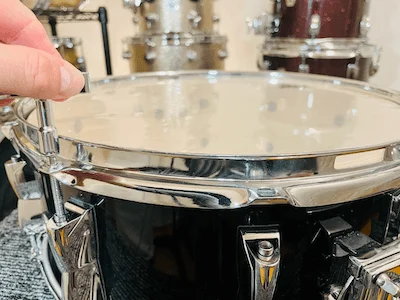
6. Tighten With Drum Key
With the tension rods finger-tightened, we’ll use the drum key to tune the head. You want to keep the head and hoop relatively flat throughout the process, so it’s important to go little-by-little, skipping across the head as you proceed.
There are many diagrams online that show a specific order of tightening tension rods. You can use those, but you may find differing opinions. Snare drums can also have different numbers of tension rods.
The main thing to remember is that if you go in a star-type pattern a little at a time, you’ll be fine. If you forget to tighten a rod on a pass, you’ll probably feel it the next time through. Just tighten that rod a little more. Unless you do something out of the ordinary, you won’t ruin the head by making a mistake in tuning.
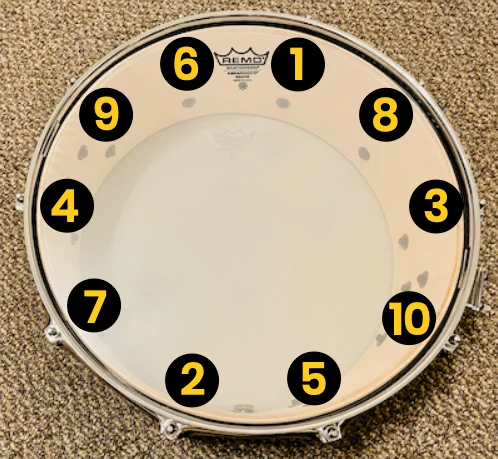
Our snare drum has 10 lugs, so we’ll tighten in this order:
Go through the star pattern, only turning your drum key a quarter-turn after feeling resistance. That part requires some feel. As you turn a few of the rods, you’ll probably find some of the rods that were finger-tightened before are loose again. That’s normal. At each step, use your key to first find the point of having a little bit of resistance, tighten a quarter-turn, and repeat on the next step of your star pattern.
How many total turns?
Every drum is different, but one key checkpoint is going through the quarter-turn star pattern and having no loose tension rods. Every rod you turn has a little resistance immediately. That means all of the rods are adding tension to the head.
After going through the pattern with no loose rods, go through the quarter-turn pattern once again. This time, if it feels like a tension rod is particularly looser or tighter than the rest, adjust that one. They don’t have to match perfectly, but none should feel out of place.
When the rods all feel about equal, give them all one last quarter-turn before moving on.
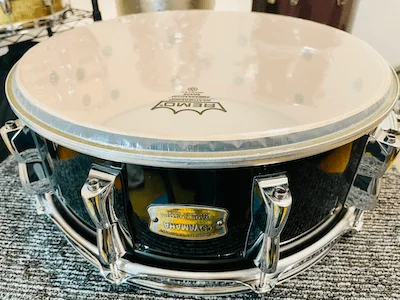
7. Check Your Tension
Finally, you’ll want to check the tension both visually and with hand pressure.
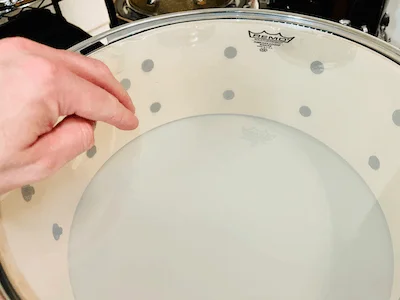
Wrinkle Check: Place your palm on the center of the head, gently pressing down. You won’t need much more than the weight of your hand. Then, look for wrinkles towards the edge of the head.
If there are minor wrinkles by the drum hoop slots, that’s okay. Snare drum shells have a snare bed cut into the shell. It’s necessary for the snare wires to work properly, but it can cause minor wrinkles. Our head has some wrinkling by the snare beds, even with the head properly tuned.

If there are wrinkles around most of the drum head’s diameter, however, you’ll want to go through the star pattern once more, and check for wrinkles again. Repeat if necessary before moving to the next check.
Poke Check: Finally, we do a kind of ‘poke check’. Even if there are no wrinkles (or only minor wrinkles by the snare beds), you still may need to repeat the star patterns more.
The head should have about as much give as the center of your hand. Gently press your fingers of one hand into the center of your opposite hand, then compare that feeling to the snare-side head. If the head feels much softer, add a little tension to the rods and re-check. If the head feels too firm, you’ll want to back off a bit.
Once the head feels about right, the snare-side head should be properly tuned!
8. Replace Snare Wires
Of course, you’ll have to replace the snare wires to complete your drum. That’s not the topic of this guide, but you can find out how to do that in How To Change Snare Wires (With Straps).
Wrap-Up
That’s it! Changing a snare-side head can be a challenge for anyone. Hopefully this guide helped you through, no matter what your experience level happens to be. The good news is once you know how to change a bottom snare head, most other drum maintenance will seem fairly easy!
By Peter Treuden – About the Author
Check out our other How-Tos, like How To Cut a Bass Drum Port Hole!