If you’ve never put a hi-hat stand together before, the process may seem a little confusing. Hi-hat stands usually ship in several pieces, without directions. Then, even if you figure out how the pieces fit together, the pedal mechanism needs to be set.
The assembly process is actually pretty simple with a little guidance. The step-by-step guide below will help you get your hi-hat stand set up the right way. In the end, you’ll have a stand that supports your hi-hat cymbals and performs like it should.
Stand types
Before we get started, keep in mind that there are many types of hi-hat stands. We’re using a PDP 700 Series Hi-Hat Stand, which has 3 legs and a wire foot support. Those are very common specs for a hi-hat stand. Your stand may look different, but that’s OK. Almost every model is assembled in the same general way, so you should be able to follow along with the pictures, no matter what type of stand you’re working with.
*We may receive a small commission from purchases made through product links, but your price does not increase at all. Thank you for the support!
With that in mind, you’re ready to start! Here’s how to assemble a hi-hat stand.
1. Remove Packaging
The first thing to do is to simply remove the tags and packaging if you’re using a new stand. If you have an old stand, make sure you have all of the parts you need.
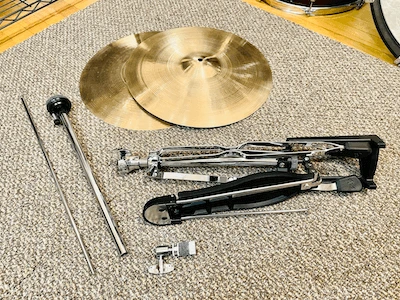
Most hi-hat stands have 4 main components: a base section with a pedal, a top section with a felt seat, a threaded pull rod, and a hi-hat clutch. Hi-hat cymbals are usually sold separately.
If you’re using an old hi-hat stand and you’re missing a part, hopefully it’s just the clutch. Those are much easier to replace than the others. The Gibraltar SC-4421D is a great value and fits almost every hi-hat stand.
2. Set Up the Base
Hi-hat stand bases come in several forms. The most common design is what we’ll show in the pictures, consisting of 3 legs and a wire foot support.
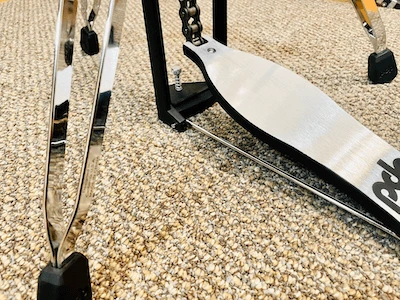
First, you’ll want to get the footboard wires affixed to the base. Squeeze the wires together enough to guide them into the base’s holes. The wires should be pushing outward though the holes, so they’ll stay in place while you’re playing. Here’s what that looks like:
Then, stand the base upright and spread the legs out. The feet and the base should all contact the floor. If the stand feels wobbly, the center base is probably positioned lower than the feet. The base shouldn’t be lifted off the ground either, however.
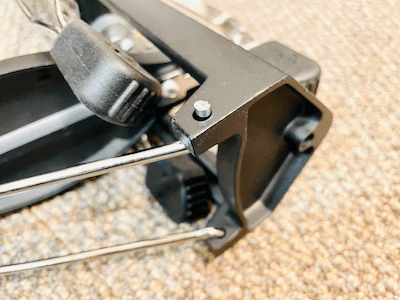
Some stands have a swiveling footboard adjustment. If that’s the case with your stand, you’ll be able to position the footboard closer to one of the legs if you’d like. The stand we’re showing doesn’t have that feature, so the footboard is always centered between two legs.
Hi-hat stands may also have a knurled spike on the heel, which is there to grip into a carpet. If your stand has that included, feel free to twist it until it’s sticking out of the bottom a 1/2″ or so.
3. Connect the Pull Rod
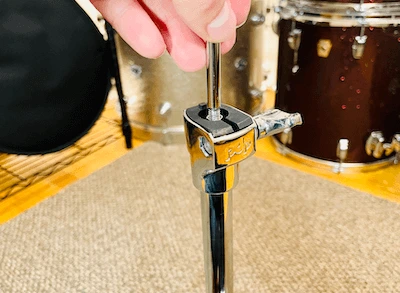
The pull rod should have one threaded end. Screw that into the threaded base post until tight.
4. Attach Stand Top
The top portion of the stand should have a felt piece on the seat. It may also use a large metal washer. Those can come off during shipping, so make sure they’re placed on your stand in the right order. If you have a washer, the washer would be set up underneath the felt.
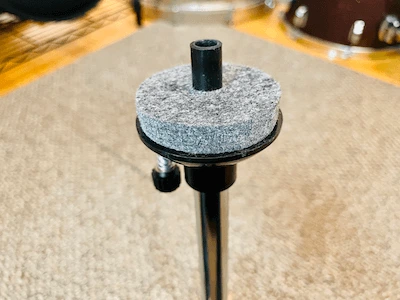
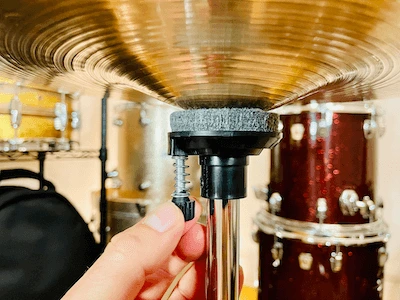
Guide the top section over the threaded pull rod you attached in step 3. You’ll probably want to adjust the exact height later, but you can get it fairly close now. Most drummers position the felt portion of their hi-hat stand a few inches below their standing waist level.
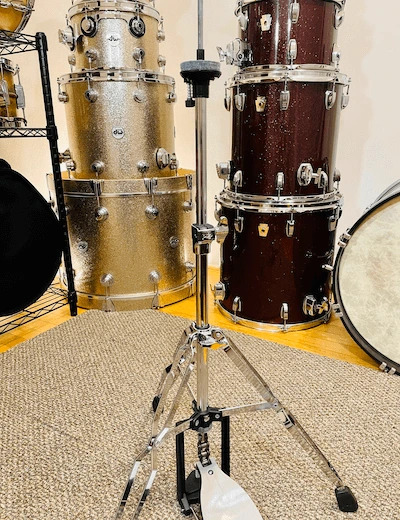
After tightening the top into place with the base’s wing nut, your stand pieces look like something this:
5. Place Bottom Cymbal
Now we’ll put the bottom hi-hat cymbal onto the stand. Hi-hat cymbals are often marked ‘top’ and ‘bottom’. If they’re not, use the heavier one on the bottom (if one is heavier). Just guide it over the pull rod, bell side down, and rest it on the stand’s felt seat.
This bottom cymbal shouldn’t move when you step on the pedal. If you test the pedal now, you should only see the rod moving up and down, but nothing else.
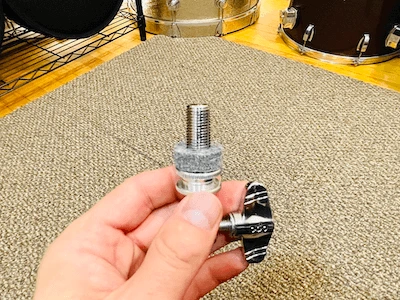
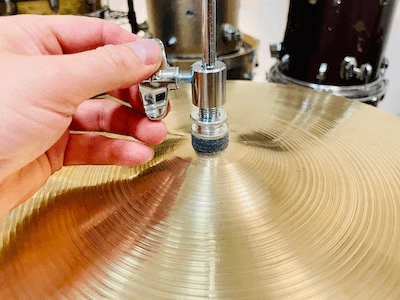
6. Attach Clutch To Top Cymbal
Unscrew the bottom nut of the clutch, then take the first felt piece off. Your clutch should look something like this, with one or two top nuts and one felt remaining:
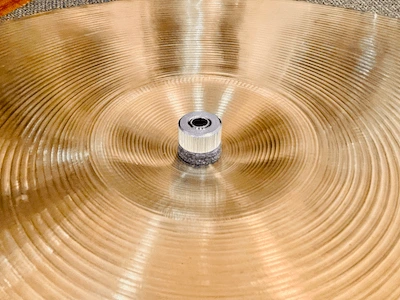
Next, hold the clutch with one hand, with the threaded end facing up. Lay the top hi-hat cymbal onto the clutch, with the bell facing down.
Finally, put the felt back on, then the nut. The top cymbal should now have a felt piece above and below it, with the bottom nut holding everything in place.
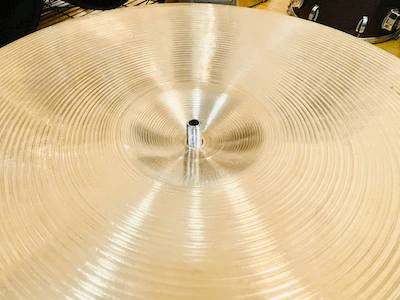
7. Place the Top Cymbal
Your top cymbal should now have the clutch attached. Flip it over, so the bell faces up. Guide it over the pull rod and lay it down onto the bottom hi-hat cymbal. Don’t tighten the clutch’s wing nut quite yet.
If you step on the pedal, the pull rod should still be the only thing moving up and down.
8. Set Cymbal Gap
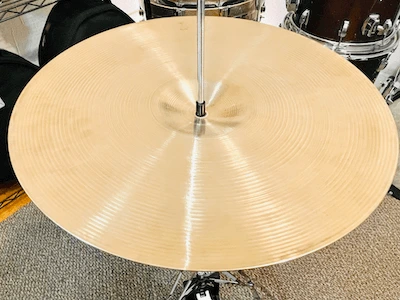
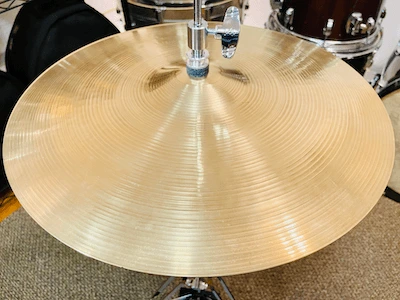
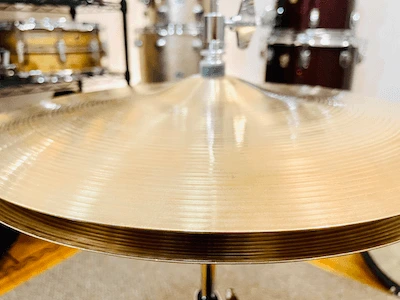
Now we’ll get the hi-hats to open and close. Step slowly on the pedal, watching the pull rod as it moves. When the pull rod moves down about 1″, tighten the clutch wing nut.
Now when you take your foot off the pedal, the top cymbal should move up. Hopefully, your hi-hat pair look similar to this:
9. Check Angle Adjustment
Most stands have an angle adjustment bolt on the underside of the cymbals. That’s there to prevent air from getting trapped, which creates a weak cymbal sound. What you don’t want is the cymbals to be perfectly parallel.
If your stand has this type of angle adjustment, look at your cymbals to see if they’re parallel with your foot off the pedal. A common setup is having one side of your hi-hats open about 1″, and the other side about 1/2″. Use the knob to tilt the bottom cymbal so the angle is slightly different than the top.
After adjusting your angle, your hi-hats should have a nice foot sound. If everything else is set up properly in previous steps, you’ll now be able to get a tight or loose sound when playing with sticks, and have a good pedal feel when playing with your foot.
Wrap-Up
That’s all there is to it! Try out the stand on a drum set to see how it works. If you need to adjust the cymbal height, no problem. Just loosen the wing nuts on both the clutch and center post, set the height, and repeat step 8. Then, just have fun drumming!
By Peter Treuden – About the Author
Changing snare wires can be difficult, even for seasoned drummers, so we made a step-by-step guide. Check out How To Change Snare Wires (With Straps)!